An internet connection is essential when you travel abroad, especially in Japan. Japan has so many great restaurants and fun attractions that, without internet, it can be hard to figure out what to do. The good news is that connecting your device to the internet is getting cheaper! If your phone supports an eSIM, you can get 3 GB of data for less than 2,500 yen!
Table of Contents
- The Benefits of Using Mobal’s Japan eSIM Card
- Ordering Your Mobal Japan eSIM Card
- How Much Data Is Enough While Traveling in Japan
- What Happened After Purchasing Mobal’s Data eSIM Card
- Activating Your Mobal eSIM
- Our Experience of Using Mobal’s eSIM Card
- Mobal’s Voice+Data eSIM
- Our Experience Using Mobal’s Voice + Data eSIM
The Benefits of Using Mobal’s Japan eSIM Card
- Mobal’s eSIM card uses Japan’s best network provider, NTT DoCoMo. This means faster internet speeds and better coverage.
- Its data packages are cheaper than other major Japanese eSIM providers (excluding international eSIM providers such as Ubigi and Airalo).
- Activation is easy. All you need to do is click on the email link and follow the prompts.
- By purchasing from Mobal, you also donate to a charity. Mobal donates a part of its profit to Seibo, a registered Japanese non-profit organization aiming to help feed every hungry child and provide them with education.
Ordering Your Mobal Japan eSIM Card
Ordering a data-only eSIM from Mobal is easy. Just choose the number of days you need and the data amount.
- For the short-term eSIMs, you can choose from 8-Day, 16-Day, and 31-Day plans.
- The 8-Day and 16-Day plans have 4 different data options: 1GB, 3GB, 10GB, and 50GB.
- If you plan to stay in Japan for a month, you can purchase either the 10GB or 50GB plan.

Before purchasing, read the details of your desired data plan by clicking the green Find Out More button.
How Much Data Is Enough While Traveling in Japan
People often ask how much data they should buy before their Japan trip. While the answer largely depends on your internet usage, you can use the following as a rough guide for a 14-day trip.
- If you only plan to use the internet for navigation, checking emails, and finding nice restaurants and attractions, 3 to 5GB is usually enough.
- If you plan to check social media and upload photos a few times a day, you will need between 5GB and 10GB of data.
- If you also want to stream while traveling in Japan, you probably need at least 30GB of data.
What Happened After Purchasing Mobal’s Data eSIM Card
Once you have successfully placed an order, Mobal should email you shortly. The email includes a link to activate your eSIM, so please don’t lose it before you activate it in Japan.

Activating Your Mobal eSIM
Once you have landed and are connected to free WiFi, click the eSIM activation link in your email. An activation code will be issued to you. Follow Mobal’s Step-by-Step User Guide to set up the eSIM on your device.
You can also use the same link to track your data usage. The page also tells you when the eSIM will expire.

Our Experience of Using Mobal’s eSIM Card
In November 2023, we spent 14 days exploring the Kansai region’s rural areas. Overall, the experience was satisfactory. While there are instances when the phone could hardly connect to the internet while trekking through the mountainous areas, those are the times when an internet connection wasn’t required.
See below for more details about our experience using Mobal’s eSIM card.
Mobal’s eSIM’s Connectivity on Trains
Mobal’s eSIM card usually connected us to the internet on trains. Depending on where the train was and how fast it travelled, there were times when the speed was extremely slow, or the phone could hardly connect to the internet.
If you need a more stable internet connection, getting a physical SIM card would be better.
Mobal’s eSIM’s Connectivity in Kyoto and Osaka’s Central Areas
We had no issues accessing the internet in Kyoto’s Osaka’s central areas using Mobal’s eSIM. The average download speed was between 15 and 25 Mbps, which let us stream videos smoothly. The average upload speed was around 5Mbps.
Mobal’s eSIM’s Connectivity Around Kinosaki Onsen, Ine Bay, Amanohashidate, Ōhara, Ōtsu, and Mt. Hiei
Our main focus of the trip was the Kyoto, Hyōgo, and Shiga Prefecture’s regional areas, including Kinosaki Onsen, Ine Bay, Amanohashidate, Ōhara, Ōtsu, and Mt. Hiei. Internet speeds were fast in the town centres, with download speeds up to 45Mbps, which is very fast.
That said, when we were deep in the mountains, such as the Yokawa area of Mt. Hiei, some parts of the precinct of Nariaiji Temple in Amanohashidate, parts of Ōhara, and the temples in Ōtsu’s deep mountains, our phones could hardly be connected to the internet.
Mobal’s Voice+Data eSIM
If you need a Japanese phone number, you can also get an eSIM from Mobal. The ordering process is similar to a physical Voice + Text + Data SIM card. You will need to submit your passport details either beforehand or upon arrival. If you choose to provide your passport details at the airport, an activation link won’t be sent to you. Instead, you will be given an activation QR code at the pick-up counter after the staff photocopies your passport.
You can refer to our Mobal Voice + Text + Data SIM Card article for more information about ordering a SIM card with a phone number.
Our Experience Using Mobal’s Voice + Data eSIM
We used Mobal’s Voice + Data eSIM during our 15-Day Tōhoku Region Cherry Blossom Trip. Reception was good in most areas we visited. Most of the time, we connected the smartphone to the internet and made phone calls without issues.
The only concerning issue was that the phone sometimes couldn’t connect to the internet at Hirosaki Park. This was probably because the park was packed with tourists visiting Hirosaki for the gorgeous cherry blossoms. The demand for reception probably exceeded the base station’s capacity.
We want to note that the eSIM lost connection when we were on the Shinkansen traveling through tunnels. But it is understandable. It is simply impossible to get any signal when the train travels at high speed through various mountains in rural areas.
Mobal’s eSIM/SIM Card Pick-Up Location at Haneda Airport
We chose to pick up the eSIM card upon arrival, just to experience it. The pick-up location is very close to the arrival gate. After you clear customs, turn right instead of going straight to the train stations.
When we got to the counter, the staff were there and asked for the order number and the passport. The whole process took only a few minutes, and we received the QR code.
The QR code will take you to Mobal’s customer portal, MyAccount. You will need to register an account if you don’t already have one. Once logged in, you will need to choose a plan from the available options. Each option has a different data allowance and eSIM expiry date. You can then send an eSIM activation request to Mobal.
We received a notification email soon after we sent the activation request. Then, we got the “Your Japan eSIM is Now Active!” email in 20 minutes. The email includes the assigned phone number and links to set up the eSIM.
On my iPhone, the eSIM downloaded smoothly. The phone prompted me to set up the eSIM straightaway and was connected to the internet in no time!
Is Pocket WiFi or an eSIM Card a Better Option for Your Next Japan Trip?
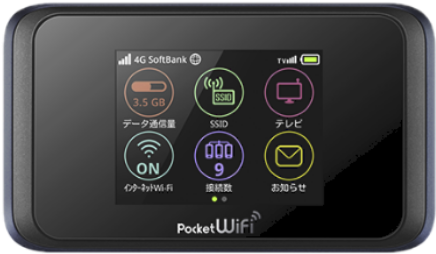
If a Japan eSIM card doesn’t sound like the best internet solution for your next Japan trip, consider purchasing a SIM or renting a Pocket WiFi.
Refer to our SIM Card, eSIM, or Pocket WiFi: Which One to Use in Japan article for answers on how to stay connected to the internet while you are in Japan!