While Japan is famous for its high-tech innovations, many restaurants and local services still rely on traditional booking methods that require a phone call. Furthermore, registering for online ticketing platforms, making online reservations, or using popular domestic apps often requires a real Japanese phone number for SMS verification. The good news is that getting a Japanese phone number as a tourist or long-term visitor is now easier and more flexible than ever through providers like Mobal.
Whether you need a full data and phone package or just a phone number, Mobal offers versatile options to suit your travel setup:
- Voice + Data SIM Cards: Available as a physical SIM card delivered worldwide for free or picked up at major Japanese airports and cities.
- Voice + Data eSIMs: Skip shipping and pick-up lines entirely. If your device supports eSIMs, you can set up a full Voice + Data plan digitally before you even land in Japan.
- Voice-Only Plans: Need a Japanese phone number for calls and SMS verifications but already have internet access via Pocket WiFi or a secondary data SIM? Mobal’s Voice-Only Plan gives you a real Japanese phone number starting at just ¥1,430/month.
Table of Contents
- The Benefits of Getting a SIM Card from Mobal
- Ordering a Mobal Voice+Text+Data SIM
- How Long Does It Take for My Mobal SIM Card to Arrive in the Mail
- Setting Up Your Mobal Account to Activate Your SIM Card
- Setting Up Your Mobal APN (Access Point Name) on Your Phone
- Our Experience of Using Mobal’s Voice + Data + Text SIM Card

The Benefits of Getting a SIM Card from Mobal
The biggest benefit of purchasing a SIM card from Mobal is your SIM card can be sent to you for FREE in most cases! This means you are connected to Japan’s network as soon as the APN is set up using the free WiFi at the airport or on the train or limousine bus. This way, you can start exploring Japan earlier than others!
Of course, if you prefer to pick up your SIM card from the major airports in Japan, this can be done too. If you want to avoid the potential queue at the airport or need another SIM card when you are in Japan, there are also pick-up points in Tokyo, Kyoto, Sapporo, Nagoya, Naha, Osaka, and Yokohama.
Summary of Mobal SIM Plans, Pricing, and Features
Mobal offers flexible options depending on whether you need data, a phone number for incoming/outgoing calls, or both. Below is a breakdown of current pricing and core features to help you pick the right plan for your trip.
Initial SIM Cost & Plan Options
- Initial SIM Purchase: The standard SIM card price is ¥4,950.
- eSIM Option Available: If your phone supports eSIM, you can opt for a Voice+Data eSIM instead of a physical SIM card, avoiding shipping or pick-up entirely.
- Japan Voice-Only Plan: For travelers who only need a real Japanese phone number and SMS (without data), Mobal offers a Voice-Only plan starting at ¥1,430/month.
Flexible Voice+Data Monthly Tiered Plans
Monthly fees are pro-rated for your first month based on your chosen activation date and start from:
| Data Allowance | Monthly Fee (tax included) | Notes |
| 1 GB | ¥1,650 | Great for basic messaging & maps |
| 5 GB | ¥3,190 | Ideal for moderate social media & navigation |
| 10 GB | ¥3,630 | Best value for typical travel use |
| 15 GB | ¥3,795 | Extra data for heavy browsing |
| 30 GB | ¥4,378 | Most popular for extended travel |
| 50 GB | ¥5,280 | For heavy data users & hotspotting |
| 100 GB / 200 GB | ¥6,490 / ¥9,900 | Available as upgrades after month 1 |
Key Features Included in All Voice+Data Plans
- Real Japanese Phone Number: Comes with a standard 070, 080, or 090 number (required for many restaurant reservations, event tickets, and app verifications in Japan).
- Superfast Docomo 5G Network: Connects to NTT Docomo’s reliable network across Japan.
- Always-On Data & Rollover: Unused high-speed data rolls over to the next month. If you exceed your monthly cap, data stays on at a reduced speed (~200 Kbps) with no overage fees.
- Free Incoming Calls & SMS: Incoming calls and texts in Japan are completely free.
- Free Incoming SMS Roaming: Receive incoming verification texts even outside Japan (ideal for maintaining access to Japanese services after returning home).
- No Contracts & English Support: Cancel anytime via your online account with no termination fees, backed by English-speaking customer support.
- Optional Add-ons: Features like Voicemail (¥495/month) and Voice/SMS Roaming (¥5,995 per activation) can be added inside MyAccount.
Ordering a Mobal Voice + Text + Data SIM
Ordering a Voice + Text + Data SIM card from Mobal is easy. All you need to do is visit the SIM card section on their website and scroll down to the Voice + Text + Data SIMs section.
Follow the steps and complete the purchase process. During this process, you will be asked how you want to receive your SIM card.


What Is Required to Purchase a Japan Voice + Data SIM Card
Because Japanese law requires telecommunication providers to collect ID from users of Japan Voice SIM cards to prevent fraudulent usage, you will be prompted to a screen to upload your ID. Rest assured that your ID will be fully encrypted once uploaded.
If you are uncomfortable uploading your ID, choose to pick up your SIM card from one of Mobal’s collection points in Japan. The available free pick-up points can be found at the end of the Mobal SIM card’s webpage.
Uploading Your ID for Mobal to Ship Your Voice + Data SIM to You
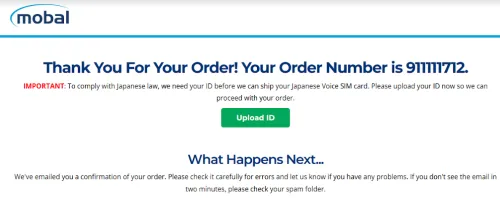
Mobal can ship the purchased SIM card for free to most countries worldwide. If you choose this option, the next step is to provide Mobal with a photo ID. You can upload your ID straight after a purchase is completed. As soon as Mobal receives and verifies your ID, they will ship your SIM card.
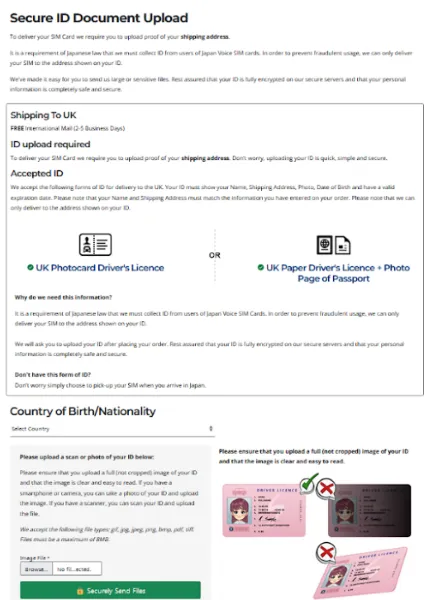
You can also choose to provide your ID to Mobal later. Once you have placed an order, you should receive 3 emails. The Order Confirmation email also contains a link to upload your ID. So, if your ID isn’t around you when you make the purchase, providing your ID later is also possible.

Important: We recommend uploading your ID as soon as possible to avoid delays in shipping your SIM card.
Once you upload your ID, you should receive an email confirming the upload was successful. It will also tell you how long it will take to verify your ID.
In our case, they approved the ID within a day. A few hours after we were told the ID was approved, we received an email saying the SIM card had shipped.

Pick Up Your Mobal to Ship Your Voice + Data SIM in Japan
If you ordered a Mobal Voice + Data SIM at the last minute, pick up your purchase on arrival. If you chose this option during checkout, you won’t be prompted to upload your ID.
How Long Does It Take for My Mobal SIM Card to Arrive in the Mail
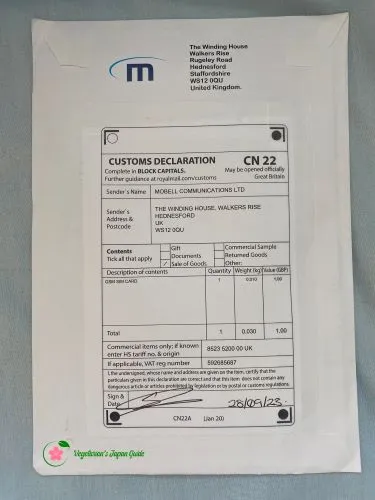
Now that you have placed your order and uploaded your ID, you’re probably excited and can’t wait for your SIM card to arrive. But how long does it take for your Mobal SIM card to arrive?
- Free shipping to Japan: 2 – 5 business days
- Free shipping to USD and UK:
- Standard: 2 – 5 business days
- Next business day shipping to the UK will cost you an extra 1,500 yen
- Free shipping to the rest of the world: 8 – 15 business days
We ordered our Mobal SIM card from Australia. It took 8 business days for it to arrive.
Setting Up Your Mobal Account to Activate Your SIM Card
Two of the three emails you receive after a purchase are related to setting up your Mobal account.
If you want to set up your account straight away, click the link to set up your password.
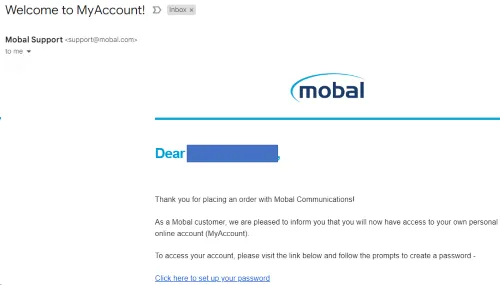
If you are like us and left it till later, the link in the email above may have expired.
But don’t worry. Another email is in your inbox with a link to Mobal’s MyAccount page. Just click the Forgot Password button to have the system send you an email to reset your password.
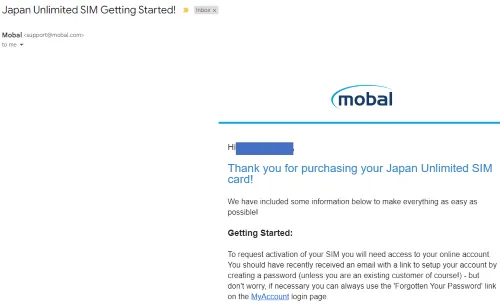
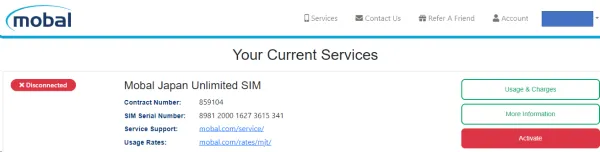
Once you are in Mobal’s portal, click the red “Activate” button for Mobal to activate the SIM card.
You will then need to choose the plan you want to purchase.
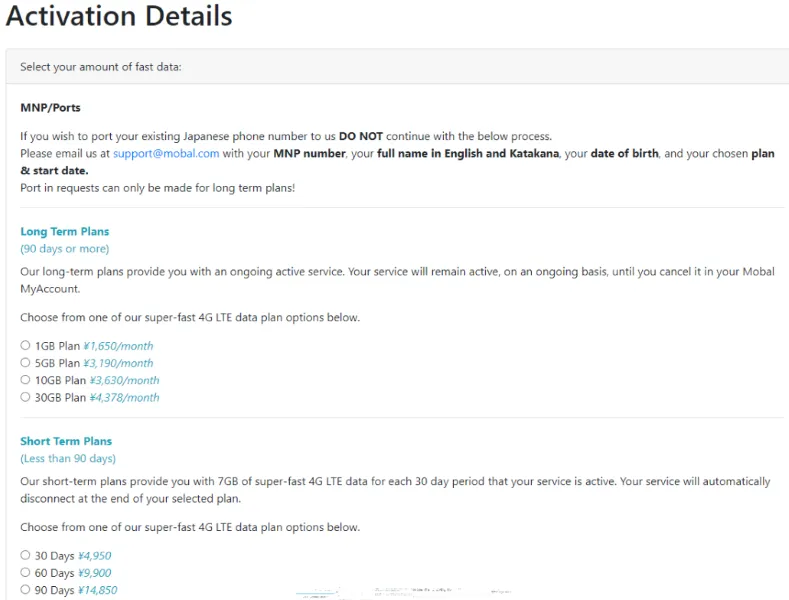
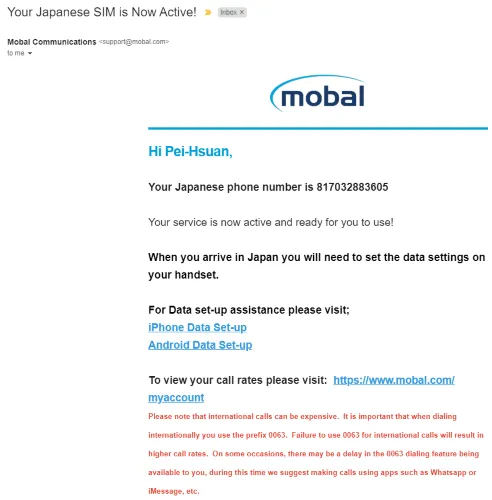
Note that the SIM card activation doesn’t take place until the day before or on the activation date you selected. Once Mobal completes SIM card activation, you will receive an email with your Japanese phone number.
We recommend choosing the activation date at least two days before your departure. The SIM card activation requests are processed between 10 am and 7:30 pm Japan time. If you requested activation outside these hours, your SIM will become active the following morning. Usually, the SIM card activation process is completed within 90 minutes.
Please also note there may be delays during busy times.
Setting Up Your Mobal APN (Access Point Name) on Your Phone
In the same email, you will also find the links to how to set up the APN on your device. This step is essential for your phone to connect to the internet. However, you can make and receive phone calls once you insert the SIM card into your phone and turn it on in Japan.
You can complete the APN setup before you arrive.
Step 1: Identify Your Plan’s APN Settings
Check your Mobal plan type to use the correct credentials:
| Plan Type | Name / Profile | APN | Username | Password |
| Voice + Data SIM / eSIM | Mobal | plus.4g | plus | 4g |
| 5G Data-Only eSIM | Mobal | uad5gn.au-net.ne.jp | [email protected] | au |
| Fixed Data-Only eSIM | Mobal | ppsim.jp | pp@sim | jpn |
Additional Android Parameters (Voice + Data):
- MCC:
440- MNC:
20- Authentication Type: PAP or CHAP
- APN Type:
default,ia,mms,supl,hipri(or selectInternetif typing isn’t permitted)
Step 2: Device Setup Instructions
iOS Setup (iPhone & iPad)
Most iPhones install the Mobal profile automatically upon inserting the SIM or activating the eSIM. If manually configuring:
Option A: Direct APN Entry (Supported iOS Versions)
- Ensure Wi-Fi is ON or active initially to navigate settings.
- Go to Settings > Cellular (or Mobile Data).
- Select your Mobal SIM / eSIM under SIMs.
- Tap Cellular Data Network (or Mobile Data Network).
- In the Cellular Data, LTE Setup, and Personal Hotspot sections, enter the corresponding APN, Username, and Password from the table above.
- Return to the main menu and turn Cellular Data ON.
Option B: Downloading the APN Config Profile
- Connect to Wi-Fi and open Safari (do not use Chrome or third-party browsers).
- Visit Mobal’s APN profile download link (provided in your Mobal confirmation email/portal).
- Tap Allow to download the profile.
- Open Settings > tap Profile Downloaded near the top (or go to Settings > General > VPN & Device Management).
- Select the Mobal APN Profile and tap Install in the top-right corner. Follow prompts to confirm.
Android Setup
- Connect to Wi-Fi (if available) and go to Settings.
- Navigate to Connections > Mobile Networks > Access Point Names(or Network & Internet > SIMs / Mobile Network > Access Point Names).
- Select your Mobal SIM/eSIM if prompt appears.
- Tap the + (Add) icon in the top right corner.
- Enter the exact settings corresponding to your plan:
- Name:
Mobal - APN: (e.g.,
plus.4g) - Username: (e.g.,
plus) - Password: (e.g.,
4g) - Authentication Type:
PAP or CHAP
- Name:
- Tap the three dots menu ⋮ in the top corner and tap Save.
- Go back to the Access Point Names menu and tap the radio button next to Mobal to make it the active profile.
- Ensure Mobile Data is toggled ON under Connections > Data Usage (or Network & Internet).
Step 3: Verifying Connection & Troubleshooting
To confirm your set up was successful:
- Disable Wi-Fi on your device.
- Look at the top status bar: you should see 4G, LTE, or 5G icons with active signal bars.
- Open a browser and load a Web page.
If Data Remains Disconnected:
- Restart Device: Turn your phone off for 30 seconds, then power back on.
- Prioritize Network Mode: Ensure your network mode is set correctly (Settings > Mobile Networks > Preferred Network Type set to 5G/4G/LTE Auto).
- Remove Old Profiles: On iPhone, delete any old travel SIM profiles under Settings > General > VPN & Device Management.
Managing or Canceling Your Mobal Plan
One of the best things about Mobal’s Voice + Data SIM is its flexibility. Unlike traditional Japanese phone carriers that lock you into 1- or 2-year contracts, Mobal offers a completely contract-free monthly service with no minimum commitment or cancellation fees.
Flexible Monthly Subscription
- No Expiration Dates: Your plan operates on a flexible monthly basis and stays active as long as you need it.
- Pro-Rated First Month: Your first month’s plan fee is pro-rated based on your chosen activation date, so you pay only for the remaining days in that calendar month.
- Useful Tool: You can use the billing calculator on Mobal’s order page before purchasing to check the exact pro-rated cost for your first month and see future monthly billing dates.
How to Cancel When Your Trip Ends
When you no longer need the SIM card (for example, when you are leaving Japan), terminating your service is simple:
- Log in to your MyAccount portal on the Mobal website.
- Submit a cancellation request before your desired end date.
- Your line will be deactivated with zero termination fees or hidden penalty charges.
Our Experience of Using Mobal’s Voice + Data + Text SIM Card
In November 2023, we spent 14 days exploring the Kansai region‘s rural areas. In conclusion, the overall experience is satisfactory. While there are instances that the phone could hardly be connected to the internet while trekking through the mountainous areas, those were times when an internet connection wasn’t required.
Refer to the below for more details about our experience of using Mobal’s SIM card. Note we didn’t test the text message function as we didn’t have any occasion that allowed us to do so.
Mobal’s Voice + Data + Text SIM Card’s Connectivity on Trains
Mobal’s Voice + Data + Text SIM Card always connected us to the internet. We didn’t have any issues with the connection failing.
Mobal’s Voice + Data + Text SIM Card’s Connectivity in Kyoto and Osaka’s Central Areas
We had no issues accessing the internet in Kyoto and Osaka‘s central areas. The average download speed was between 15 and 25 Mbps, which let us stream videos smoothly. The average upload speed was around 5Mbps.
Mobal’s Voice + Data + Text SIM Card’s Connectivity Around Kinosaki Onsen, Ine Bay, Amanohashidate, Ōhara, Ōtsu, and Mt. Hiei
Our main focus of the trip was the Kyoto, Hyōgo, and Shiga Prefecture’s regional areas, including Kinosaki Onsen, Ine Bay, Amanohashidate, Ōhara, Ōtsu, and Mt. Hiei. The internet connection was fast in the town centers, with a download speed tested up to 45Mbps, which is fast.
That said, when we were deep in the mountains, such as the Yokawa area of Mt. Hiei, some parts of the precinct of Nariaiji Temple in Amanohashidate, parts of Ōhara, and the temples in Ōtsu’s deep mountains, our phones could hardly be connected to the internet.
Our Experience With Mobal’s Customer Support Team
The APN configuration is easy for iPhone users. All you need to do is follow the set-up link in Mobal’s email and download the profile. However, if you have an Android phone, you will need to configure the APN manually. Please follow all steps, including the APN settings that must be entered manually.
When we first entered the APN details, one special character was entered incorrectly, which prevented our Android device from connecting to the internet. Without realizing the error, we sent an email to Mobal’s customer support team, which can take up to 2 business days for a reply.
We sent our query on a Saturday and received a response on Monday (probably because Mobal’s customer support team doesn’t work on weekends or public holidays). Fortunately, we figured out what went wrong beforehand and could use the internet the next day. Otherwise, it would have been inconvenient and frustrating.
Is Pocket WiFi or an eSIM Card a Better Option for Your Next Japan Trip?
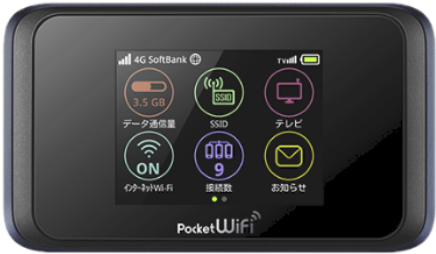
If a Japan eSIM card doesn’t sound like the best internet solution for your next Japan trip, consider purchasing a SIM or renting a Pocket WiFi.
Refer to our SIM Card, eSIM, or Pocket WiFi: Which One to Use in Japan article for answers on how to stay connected to the internet while you are in Japan!