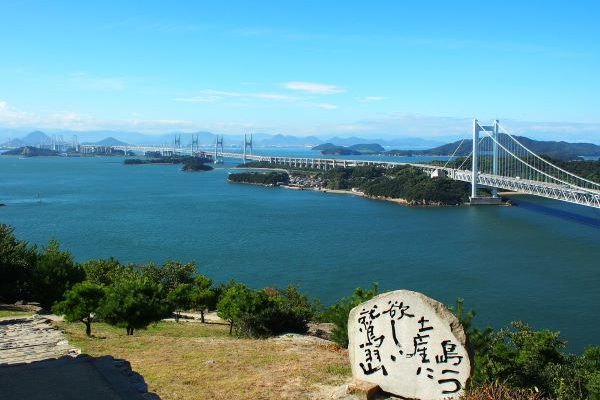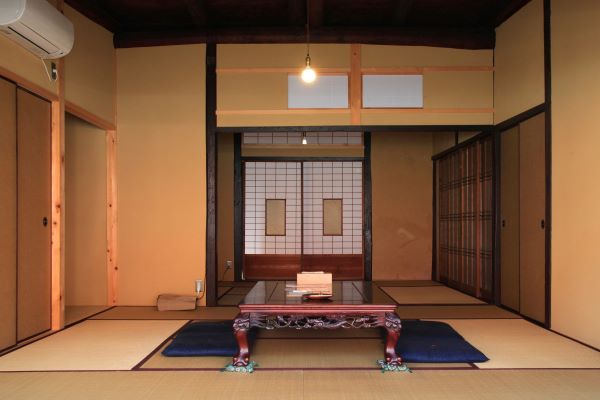
While many travelers stick to the classic “Golden Route,” the journey from the bustling heart of Kansai down to the volcanic landscapes of Kyushu offers a more diverse and authentic look at Japan. This 14-day itinerary focuses on the scenic Sanyo region and the vibrant island of Kyushu, offering a blend of iconic landmarks and quiet, local discoveries. Over two weeks, you will trade the neon lights of Osaka for the floating shrines of Miyajima, the samurai history of Himeji, and the famous street food culture of Fukuoka. Designed for those who want to see more of the country without the Tokyo crowds, this guide covers the essential transport passes, must-visit cities, and hidden gems along Japan’s southern corridor.
About the 14-Day Kansai to Kyushu Itinerary
While 14 days are definitely not enough to explore all the awesome attractions between Kansai and Kyūshū, they are enough to visit the most popular ones. This was the itinerary we followed in 2017 (but we have updated the logistic information). For the scenic spots in this article, we focus on those famous for the fall foliage, which mostly peak from mid to late November.
For most places, there is also a link to the city/town where that particular attraction is located. You can refer to it for more ideas of where else to visit for those who have the luxury of staying in Japan longer! On the other hand, if you don’t have 14 days, take away a few spots that appeal to you less.
Furthermore, this itinerary assumes you are taking public transport at all times. We therefore recommend that you use the 2 passes below.
- Kansai WIDE Area Pass from day 2 to day 6 because it will save you at least 1,000 yen.
- Sanyo-San’in Northern Kyushu Pass from day 7 to day 13 because it will save you at least 10,000 yen, assuming you take the bullet train whenever possible.
With the passes, whenever you are traveling on the bullet train, remember to reserve your seats in advance at the JR ticket center, Midori no Madoguchi (みどりの窓口), as there is no guarantee that you will get a seat in the non-reserved carriages. When we say in advance, it is better to do so at least the night before.
The 14-Day Itinerary in a Snapshot
| Prefecture | City | Accommodation In | Attractions | |
| Day 1 | Osaka/Kyoto | Osaka/Kyoto | Osaka/Kyoto | |
| Day 2 | Kyoto | Miyazu | Ine Bay | Amanohashidate |
| Day 3 | Kyoto | Ine Bay | Kinosaki Onsen/Toyooka | Ine Bay |
| Day 4 | Hyōgo | Toyooka | Kinosaki Onsen/Toyooka | Kinosaki Onsen |
| Day 5 | Hyōgo | Izushi | Osaka/Kyoto | Izushi |
| Day 6 | Hyōgo | Himeji | Himeji | ☛ Himeji Castle ☛ Kōkōen Garden ☛ Mt. Shosha |
| Day 7 | Okayama | Kurashiki | Kurashiki | ☛ Kaze-no Michi ☛ Kojima Gakuseifuku Museum ☛ Shōshūhō |
| Day 8 | Okayama | Takahashi | Kurashiki | ☛ Bitchū Matsuyama Castle ☛ Kurashiki Bikan Historical Quarter |
| Day 9 | Hiroshima | Miyajima | Miyajima | Miyajima |
| Day 10 | Hiroshima/Ōita | Miyajima/Hakata | Hakata | Hakata |
| Day 11 | Ōita | Beppu | Beppu | Hells of Beppu |
| Day 12 | Ōita | Yufuin | Yufuin | Yufuin |
| Day 13 | Ōita | Yufuin | Hakata | Yufuin, Hakata |
| Day 14 | Ōita | Hakata | Hakata |
Day 1: Arrive in Kansai – Finding Your Feet in Osaka or Kyoto
Assuming you are flying into Osaka, depending on when your flight arrives in Japan, you may or may not have time for sightseeing. If your flight is long-haul, you might need another relaxing day to recover from jet lag. This is why we have purposely left the first-day itinerary blank.
Day 2: Amanohashidate – Walking Across One of Japan’s “Three Great Views”
Osaka/Kyoto ⇒ Aamnohashidate ⇒ Ine Bay
Day 2 is the day to visit one of Japan’s Three View, Amanohashidate. If you stayed in Osaka on Day 1, take the Kounotori-Go (こうのとり号) from Osaka or Shin-Osaka Station to Fukuchiyama Station. From there, change for the limited express, Hashidate-Gō (はしだて号) to Amanohashidate.
If you stayed in Kyoto on Day 1, take the limited express, Hashidate-gō (はしだて号) from Kyoto Station to Amanohashidate.
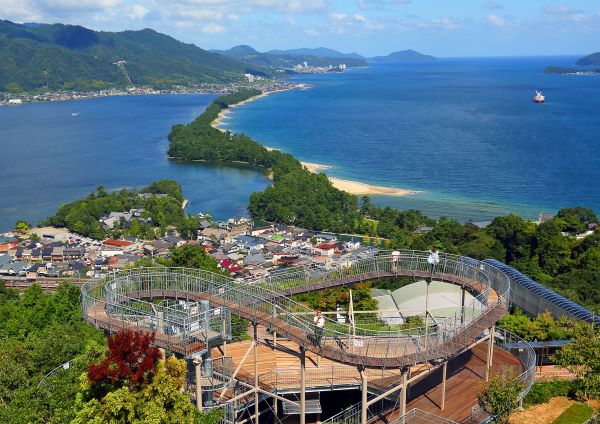
Living up to the name of one of Japan’s Three Views, Amanohashidate is stunning throughout the year. The famous 3.6-km sandbar with 5,000 pine trees growing on top is best adored from one of the observatories in the area.
In addition, there are a couple more attractions to explore, and you can enjoy SUP and kayaking here!
For more information about Amanohashidate, refer to our Amanohashidate article.
When the sun starts to set, take a bus to Ine Bay for a relaxing night in the unique Funaya on the bay shore!
Day 3: Ine Bay – A Slow Travel Escape to Japan’s Floating Boathouses
Ine Bay ⇒ Kinosaki Onsen
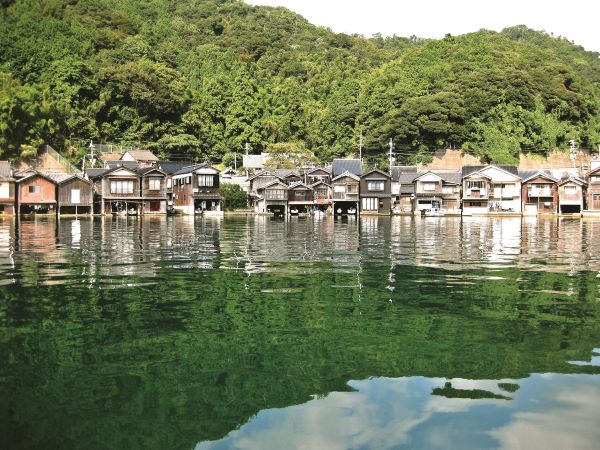
If you’re looking for an escape from the ‘Golden Route’ hustle, Ine Bay is the answer. Known for its 230 traditional Funaya (wooden boathouses) lining the water’s edge, this quiet fishing village offers one of the most authentic Japanese coastal experiences available today.
So, Day 3 is all about enjoying the unique townscape where many of the traditional houses have been transformed into BnB, cafes, and shops!
Staying in a converted Funaya isn’t just about the view. It is about the silence and the rhythm of local life. Unlike the major tourist hubs, Ine remains a ‘Slow Travel’ sanctuary where you can explore the bay by bicycle or boat without fighting for a photo spot. It is the perfect place to disconnect and experience Japan at its most serene.
For more information, refer to our Ine Bay article!
Then after you have your fill at Ine Bay, take a bus back to Amanohashidate Station. From there, take Kyoto Tango’s train to Toyooka Station and change for a JR train to Kinosaki Onsen.
Note that the hotel and ryokan rates in Kinosaki Onsen are expensive in autumn. As an alternative, you can stay around Toyooka Station for the night and head to Kinosaki Onsen on Day 4. Toyooka Station is just 10 minutes away by train.
The hot spring town has 7 public bathhouses for you to enjoy the onsen. So you don’t necessarily need to stay in Kinosaki Onsen for the nice hot spring.
Day 4: Kinosaki Onsen – A 1,300-Year-Old Riverside Hot Spring Sanctuary
Kinosaki Onsen

The quintessential Kinosaki Onsen Town has been a sanctuary for healing and relaxation for over 1,300 years. Renowned as one of Japan’s best hot spring destinations, Kinosaki is famous for its unique “Sotoyu Meguri” (bathhouse hopping) culture, where visitors stroll along willow-lined streets in traditional yukata and wooden geta sandals. In addition to the Michelin-starred view from Mt. Daishi, you can also experience the southward-facing reversed magnetic field at Genbudo Park nearby!
For more information, refer to our article on Kinosaki Onsen.
For Day 4’s accommodation, stay in the same hotel as Day 3.
Day 5 – Izushi – Stepping Back in Time in the “Little Kyoto” of Tajima
Kinosaki Onsen ⇒ Izushi ⇒ Osaka/Kyoto
After breakfast, take a bus to Izushi, a quaint town near Kinosaki Onsen. Often called ‘Tajima’s Little Kyoto,’ this preserved castle town is another destination to escape from the crowds of Kyoto and Osaka. It offers all the Edo-period charm, red-lacquered shrines, and historic clock towers of its famous namesake, but with a fraction of the foot traffic.
Of course, no visit is complete without participating in the local ‘Izushi Soba’ tradition, a culinary experience as historic as the town itself.
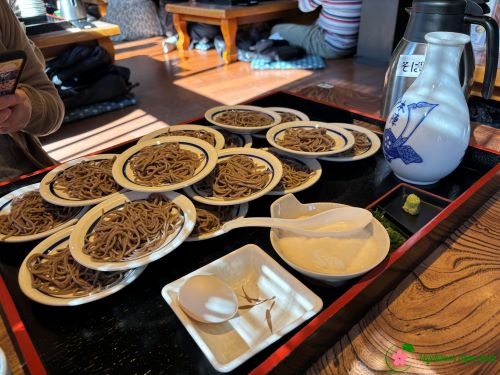
For more information, refer to our Izushi article.
Day 6: Himeji Highlights – The Iconic White Heron Castle & Zen Mountain Retreats
Osaka/Kyoto ⇒ JR Himeji Station ⇒ Mt. Shosha ⇒ Himeji Castle ⇒ Kōkōen Garden
The schedule for day 6 is quite tight as we tried to pack all the best spots in Himeji into one day.
Osaka to JR Himeji Station (姫路駅)
From Osaka to Himeji, the fastest way is to take the bullet train, so you can be at JR Himeji Station in 30 minutes from JR Shin-Osaka Station (新大阪駅). The Mt. Shosha Ropeway’s first departure is at 8:30 am. Ideally, catching that one will be the best. But, as the ropeway departs every 15 minutes, we would say catching any of the first four services of the day will give you enough time at all three attractions listed below.
To catch one of the first four ropeway services, take a bus from JR Himeji Station to Mt. Shosha. On weekdays, buses depart at 8:05 or 8:40. On Saturday, Sunday, and public holidays, buses depart at 20-minute intervals from 8:15.
We recommend booking your accommodation close to JR Himeji Station. This is so you can drop off your bags with your accommodation provider before you head to Mt. Shosha.
Mt. Shosha (書写山)
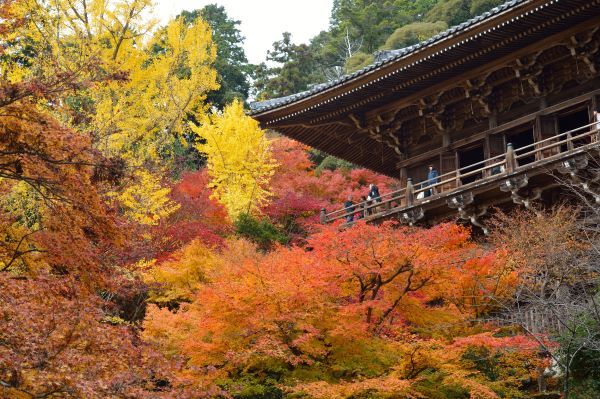
Mt. Shosha is a hidden gem in Himeji City. Many tourists come to Himeji for just Himeji Castle and remain unaware of the mountain’s natural beauty. Especially in autumn, the autumn foliage scenery combined with the worship halls of the Engyōji Temple (圓教寺) is just stunning. And, from the lookouts in the mountain, you will get a wide view of Himeji City.
For more information, please refer to our article on Mt. Shosha!
It takes around two to three hours to explore the top of the mountain at a relaxing pace. You can also have lunch at the temple. If you are vegan or vegetarian, please refer to our article on Mt. Shosha’s Unique Vegan Cuisine Experience for more information.
Himeji Castle, your next stop for the day, is located close to JR Himeji Station. After you have your fill at Mt. Shosha, head to the bus stop where you got off this morning and take the same bus to Himeji Castle. This time, instead of heading all the way back to the station, please get off at Himejijō Ōte Mae (姫路城大手門前).
If you choose not to have lunch at Mt. Shosha, there are many restaurants and cafés that you can choose from before you head to the castle.
Himeji Castle (姫路城)
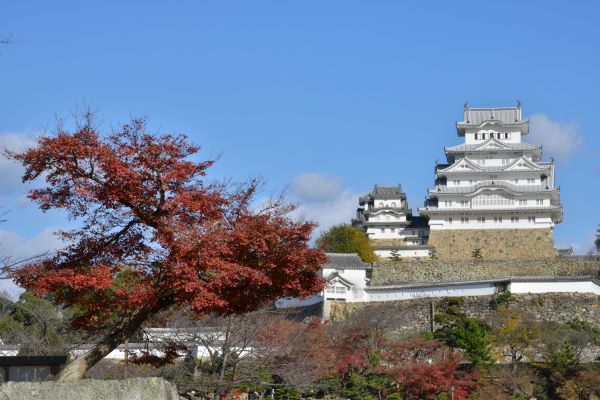
Known as the ‘White Heron Castle’ for its brilliant white exterior, Himeji Castle is widely considered the most beautiful and complete surviving example of Japanese castle architecture. Because the UNESCO World Heritage site is a massive complex with hidden defense features and steep climbs, we have put together a detailed guide to Himeji Castle to help you navigate the grounds and discover the best photo spots in the castle’s grounds.
Kōkōen Garden (好古園)
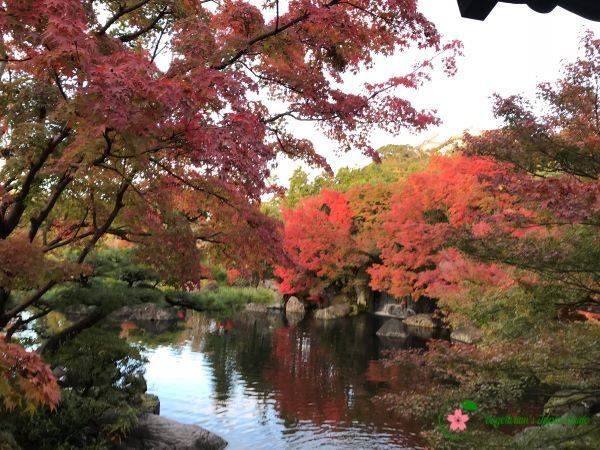
Next to the famous Himeji Castle is the castle’s not-so-famous garden, Kōkōen. It is one of our favourite gardens in Japan because, although it was built relatively recently, it consists of several small gardens, each with a different Japanese gardening style! Plus, it has an authentic Japanese tea room that serves freshly whisked matcha and a traditional Japanese sweet for anyone up for an afternoon tea!
For more information, please refer to our article on Kōkōen.
Day 7: Kojima – Discovering Japan’s Denim Heritage and Seto Inland Sea Views
JR Himeji Station ⇒ JR Kurashiki Station ⇒ JR Kojima Station ⇒ Kaze-no Michi ⇒ Kojima Students Uniform Museum ⇒ Betty Smith Jeans Museum ⇒ Shōshūhō
Before going to bed on day 6, pack your things as you will be staying in Kurashiki from day 7 to day 9!
After you drop your bags at your hotel close to JR Kurashiki Station (倉敷駅), let’s head to Kojima, a town famous for its denim industry and the spectacular view of the Seto Inland Sea and the Seto Ōhashi Bridge (=゚ω゚)ノ.
If your day 7 falls on a Friday, a Japanese public holiday, or on the weekend, instead of catching the train, catch the Jeans Bus! It is a bus decorated with jeans and denim elements, too special not to travel with!
And once you reach Kojima, even if you aren’t interested in shopping, stop by the Kojima Jeans Street to see how the locals promote their denim products (^_-)-☆.
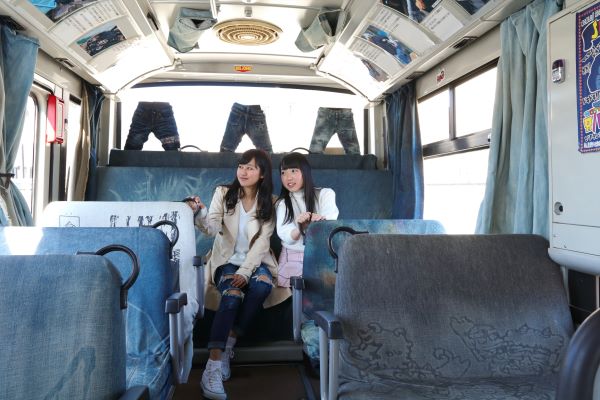
For those who are interested in Japanese gardens and traditional houses, don’t forget to drop by the Old Nozaki Family Residence (旧野崎家住宅), which is just a 5-minute walk from Kojima Jeans Street!
For more information about the bus, Kojima Jeans Street, and Old Nozaki Family Residence (旧野崎家住宅), please refer to our Kojima District article.
Kaze-no Michi (風の道)
If you enjoy cycling, make sure you rent one out from one of the two rental facilities close to JR Kojima Station (児島駅).
Kaze-no Michi is a 6.3 km well-maintained track that will lead you to many scenic spots in the Kojima District. And for attractions not on the track, you can always make a detour to save on transportation costs!
For those who love trekking, you can also walk on the same track, but just be careful with the bikes that may be coming from behind you. A one-way journey will take about 2 hours.
Please refer to the Kojima Cycling Map for a visual idea of this trip. The red line on the map marked the abandoned Shimotsui Dentetsu train line. And instead of heading back to JR Kojima Station the same way you came from, follow the blue line to enjoy the view of the Seto Inland Sea!
For more information about bike rental, please refer to our Kojima District article.
Depending on how you plan to explore Kojima, you might want to keep your rental bike until you are ready to head to Shōshūhō, the summit of Mt. Washu.
And after you are done with Kazu-no Michi, it is time to find a restaurant for some delicious lunch!
Kojima Students Uniform Museum (児島学生服資料館)
The afternoon starts with the history of the iconic Japanese school uniform. The museum’s ground floor will give you a big-picture view of how uniforms have evolved over the last couple of decades.
When you head upstairs, it is time for a photo session to dress up in uniforms of different styles!
For more information about the museum, please refer to our Kojima District article.
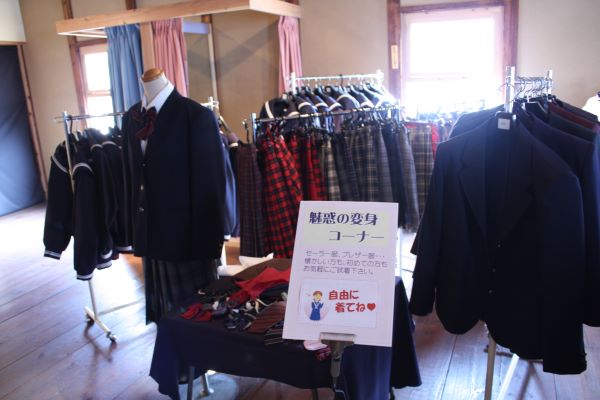
Betty Smith Jeans Museum (ベティスミス ジーンズミュージアム&ヴィレッジ)
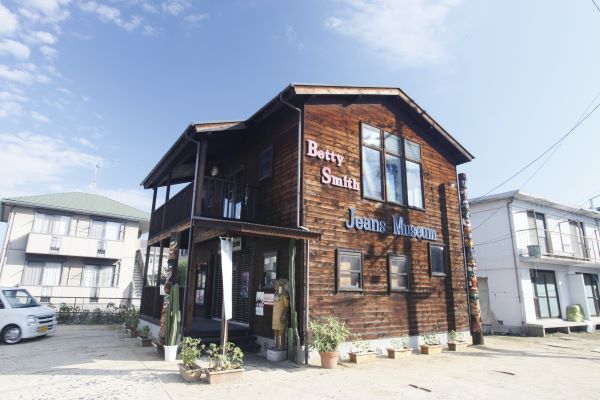
Just a 10-minute walk from the Kojima Students Uniform Museum is another museum about jeans. You will learn how denim was made back then, before machines took over.
Although not from scratch, it is also a place where you can design your pair of jeans!
For more information, please refer to our Kurashiki City article.
Shōshūhō (鐘秀峰)
The last stop of the day is Shōshūhō, the summit of Mt. Washu or Washuzan (鷲羽山) in the Seto Island Inland Sea National Park. It is the perfect place to get a panoramic view of 50 islands, together with the famous Seto Ōhashi Bridge!
The sunset from Mt. Washu was chosen as one of the 100 Best Sunsets In Japan. This is why we left this spot till the last.
If your Day 7 falls on a Friday or Saturday, or the next day is a Japanese public holiday, there will be a sunset bus tour departing from JR Kojima Station at 3:30 pm.
But even if the bus tour isn’t running, regular buses still operate during the day. The only thing you need to watch out for is not to miss the last bus to JR Kojima Station from the Mt. Washu bus stop.
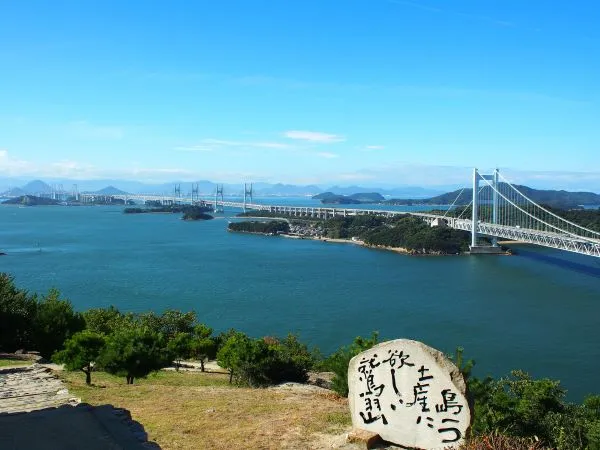
To find out more on how to get there as well as the best time to be there, please refer to our Shōshūhō article (=゚ω゚)ノ.
Day 8: Takahashi and Kurashiki – From the “Castle in the Sky” to the Historic Canal District
JR Kurashiki Station ⇒ JR Bitchū-Takahashi Station ⇒ Bitchū Matsuyama Castle ⇒ Kurashiki Bikan Historical Quarter
A large part of today’s schedule is at the famous Kurashiki Bikan Historical Quarter. But before that, let’s discover the castle in the sky – Bitchū Matsuyama Castle!
Bitchū Matsuyama Castle (備中松山城)
In this itinerary, you have visited two Japanese castles already. So you might be reluctant to go for a third one. But we guarantee you that this is the castle that you will regret later on if you give it a miss, especially in November, as it is the best time to see the castle floating in the sky!
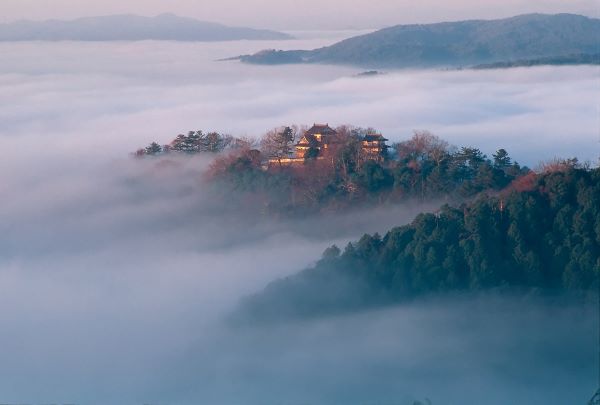
To see this special scenery, reserve your spot for a sightseeing taxi that will fetch you to the Sea of Clouds Observatory (雲海展望台) at 7:30 am or 8 am from JR Bitchū-Takahashi Station (備中高梁駅). So wake up early and head to JR Bitchū-Takahashi Station, which is 25-35 minutes away depending on which train you catch.
Taking the sightseeing taxi, you will be back at JR Bitchū-Takahashi Station at 9:10 am at the latest. From there, you can decide whether you want to head up to the castle to meet the castle’s lord, Sanjūrō.
For more information, please refer to our article about Bitchū Matsuyama Castle!
Kurashiki Bikan Historical Quarter (倉敷美観地区)
The Kurashiki Bikan Historical Quarter is also known as Japan’s “Little Venice”. It is a historical area comprising classical Japanese architecture and a gorgeous canal. With the canal surrounded by unique traditional Japanese housing, it isn’t just one of the main attractions for tourists visiting Okayama Prefecture, but also a popular Japanese drama/movie shooting location!
With a variety of shops, eateries, and galleries in the area, you can easily spend a whole day here without getting bored (=゚ω゚)ノ.
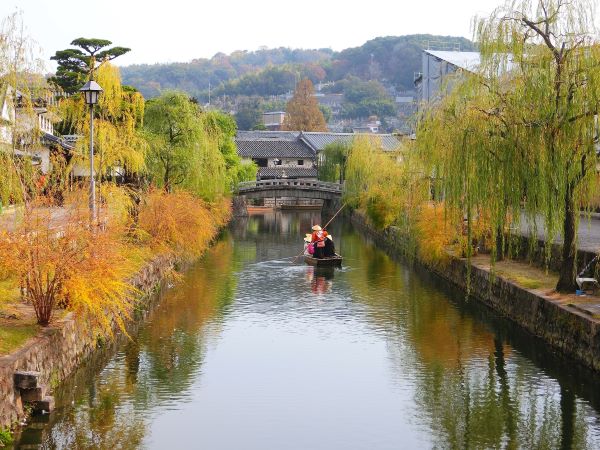
For more information about where to go and what to do here, please refer to our article about Kurashiki Bikan Historical Quarter!
Also, for the samurai sword fans out there, there is another sword museum where you might be able to actually hold one in your hand, close to Kurashiki Bikan Historical Quarter. Please refer to the part of the Kurashiki City article that talks about the Kurashiki Art Sword Museum (倉敷刀剣美術館) for more information.
Days 9-10: Miyajima – Shrines in the Sea and the Sacred Peaks of Itsukushima
JR Kurashiki Station ⇒ JR Miyajimaguchi Station ⇒ Miyajima ⇒ JR Hakata Station
After you check out from your hotel on the morning of day 9, head straight to JR Kurashiki Station. If you are holding a JR pass that covers the section between Okayama and Hiroshima, the fastest way to get to JR Miyajimaguchi Station (宮島口駅), which is the station closest to the pier, is to catch a bullet train to JR Hiroshima Station (広島駅).
Since JR Kurashiki Station isn’t a stop on the bullet train, it will take more than one train to get to Hiroshima. From JR Hiroshima Station, take the local train to JR Miyajimaguchi Station (宮島口駅). From there, catch one of the ferry services, and you will be at Miyajima in 10 minutes!
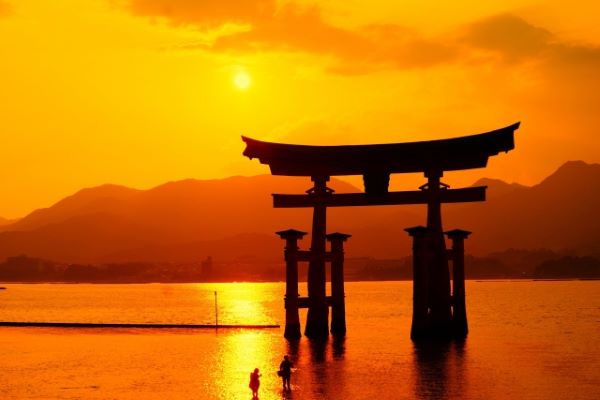
Miyajima has become increasingly well-known, partly due to its World Heritage Status and, potentially, to the friendly, cheeky deer on the island.
So if you haven’t been to this sacred island, you are missing out! And the island is a lot more than just the Itsukushima Shrine and the Great Torii Gate in the sea. To find out why we allocate a day and a half for this spot, check out our article about Miyajima!
After you have your fill of the island on day 10, hop back onto the ferry, and let’s head to JR Hakata Station (博多駅) in Kyūshū! Depending on what time you leave Miyajima, you may or may not have time to stroll around the city of Hakata.
Tip: As you will be back in Hakata on the night of day 13, we recommend you book the same hotel for day 10 and day 13. So you can leave everything you won’t need on days 11 and 12 at the hotel in Hakata to pick up yourself. And even if your hotel for day 10 and day 13 is different, you can always check with either hotel to see if they can hold your bags, as both of the hotels we stayed at were happy to do so (=゚ω゚)ノ.
Day 11: Beppu – Witnessing the Volcanic Power of the “Seven Hells” Onsens
JR Hakata Station ⇒ JR Okura Station ⇒ JR Beppu Station ⇒ The Hell of Beppu

Get up early on day 11, as it takes about 1.5 hours to get to JR Beppu Station (別府駅) from JR Hakata Station. Ideally, you want to be in Beppu by 10 am, so you should leave Hakata between 8 and 8:30 am. For this part of the journey, we don’t recommend taking the, Yufuin-no-Mori. Because the train will take longer to reach Beppu than the normal limited express train. Instead, please take the limited express Sonic (特急ソニック) from JR Okura Station (小倉駅), which you can get to by taking a bullet train from JR Hakata Station.
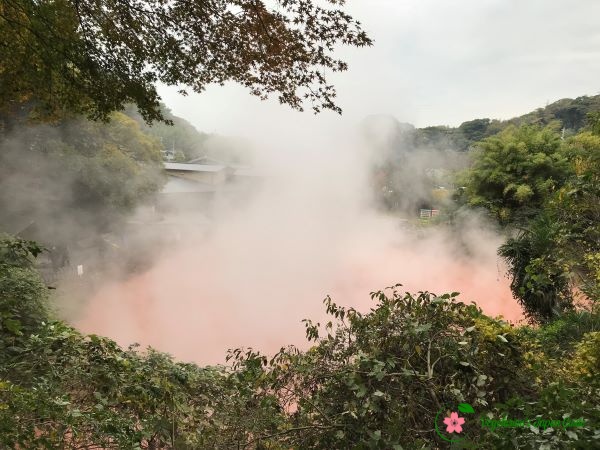
So why are we in such a hurry? Because the most popular destination in Beppu, The Hell of Beppu, takes around 6 hours to explore! Obviously, you can explore some on day 12, but that means you will have less time in Yufuin. So as soon as you drop off your luggage at your accommodation in Beppu, head straight back to the bus stop in front of the station!
For more information about why the hells are so awesome, please refer to our article about The Hell of Beppu!
For lunch or dinner on the day, give the Jigoku Mushi Kōbō Kannawa a go. Although it is a self-service restaurant, you will have so much fun there! And honestly, we probably wouldn’t bother visiting if they cooked the food on our behalf. As the restaurant is quite popular, having an early or late lunch/dinner will reduce your wait time.
Days 12-13: Yufuin – Lakeside Strolls and Sightseeing Trains in Kyushu’s Premier Resort
JR Beppu Station ⇒ JR Yufuin Station ⇒ JR Hakata Station
From JR Beppu Station, take the sightseeing train Yufuin no Mori, and you will be at the onsen resort – Yufuin in around an hour! As a reservation is essential to board this train, please refer to our article about Yufuin no Mori for more useful information.
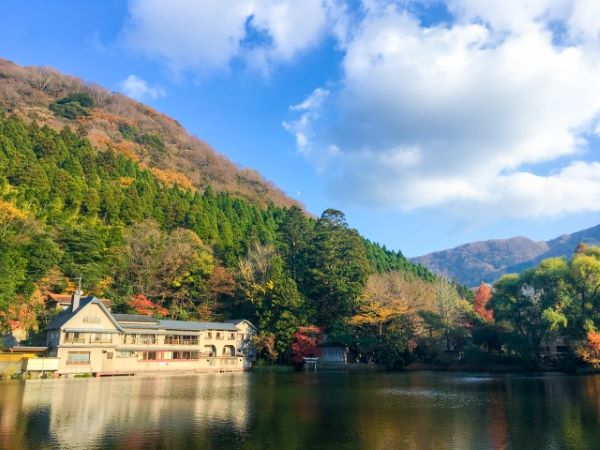
As always, once you reach JR Yufuin Station, head to your accommodation to drop off your bags.
In Yufuin, there are many hotels, ryokans, and even hostels for you to choose from. If you arent’ sure where to stay and have a bit of budget to splash, we had a great time at Yufunogo Saigakukan (柚富の郷 彩岳館). Follow the link to find out about our experience at this onsen ryokan!
For information on where to go and when to visit Lake Kinrinko, please refer to our article on Yufuin.
After you have had enough of this gorgeous onsen town on day 13, it is now time to head back to Hataka for some last-minute souvenir shopping!
Day 14: Hakata – Ramen Culture and Last-Minute Shopping in Fukuoka’s Hub
Assuming you are flying off from Fukuoka Airport, you should have a bit of time before you have to head to the airport to enjoy the delicious food in restaurants in Hakata. Just make sure that you have plenty of time to get to the airport.
Unlike airports in Tokyo and Osaka, the Fukuoka Airport subway stop isn’t located just at the airport. You have to take a connecting bus from the subway station to the actual airport, so allow an extra 15 to 30 minutes. We weren’t aware of this and were a bit stressed out toward the end of our trip…

Japan Travel Essentials for Your Upcoming Trip
- eSIM Recommendation: Instead of renting a Pocket WiFi, an eSIM gives you more flexibility and avoids the hassle of charging it and sending the device back at the end of your trip. If your phone supports eSIMs, get one for your upcoming trip. We used Jetpac late last year. It worked well even in the rural areas. It is a relatively newer company, but the pricing is very competitive. You get free access to WhatsApp Chat, Uber, Grab and Google Maps even when your data runs out. Plus, there’s free travel perks! Refer to HERE for a comparison table of the good eSIM providers.
- Luggage Forwarding (Takkyubin): If you don’t want to drag your suitcase around, utilize Japan’s luggage forwarding service. Just note that your luggage most likely won’t arrive on the same day, but the next day.
More Japan Itinerary
Ready to explore more of Japan? If you are ready to dive deep into the hidden gems of other parts of Japan, such as the scenic Tōhoku and Chūbū regions, we have mapped out the perfect routes for you.
Check out our full collection of Japan Travel Itineraries for detailed transport guides, seasonal highlights, and plant-based dining tips to help you plan your next stress-free journey.